基于 Vue.js 2.0 酷炫自适应背景视频登录页面实现方式
时间:2020-10-07 14:26:38 | 栏目:vue | 点击:次
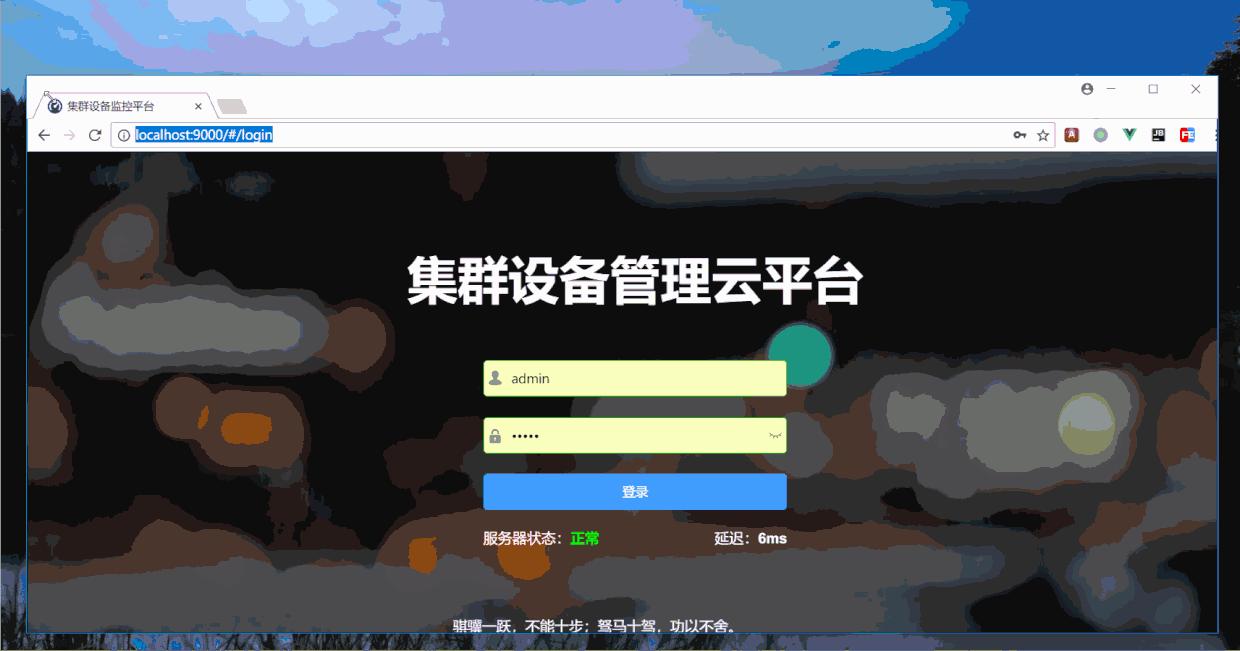
本文讲述如何实现拥有酷炫背景视频的登录页面,浏览器窗口随意拉伸,背景视频及前景登录组件均能完美适配,背景视频可始终铺满窗口,前景组件始终居中,视频的内容始终得到最大限度的保留,可以得到最好的视觉效果。并且基于 Vue.js 2.0 全家桶。具体效果如下图所示:
最终效果可以翻到文章最后观看。

1. 背景视频 Web 页面的既有实现方式
国外有一个很好的网站 「Coverr」 ,提供了完善的教程和视频资源,帮助前端开发者构建酷炫的背景视频主页,网站效果示例如下图所示:

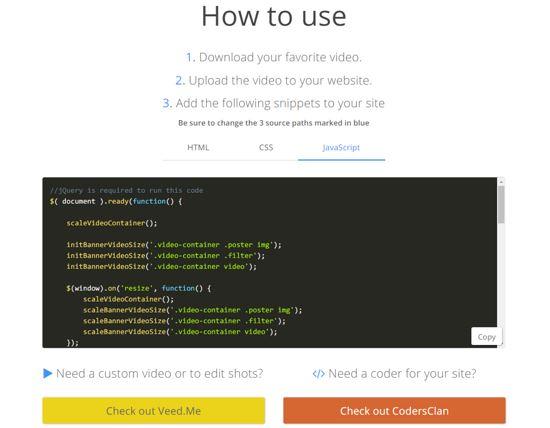
教程如下所示:

从图中以及我的实践可以得出以下观点:
- 该教程使用了 jQuery 。由于我们想要使用 Vue.js,则 jQuery 可被完全替代掉。
- 该教程的 CSS、JavaScript 代码均过于冗余。
- 直接运行示例,发现效果并不好,浏览器窗口随意拉伸时,背景视频并不能完美适配「会出现黑边等瑕疵」,效果未达到预期。
2. 设计完美的背景视频 Web 页面
首先基于脚手架工具 vue-cli 来创建一个使用 vue-loader 的项目,构建完毕后,在相应目录下创建「.vue」文件,作为登录页面的模板文件,具体细节不再赘述。本节内容仅局限于该.vue文件。
2.1 HTML 模板
基于需求,对 Coverr 提供的 HTML 模板进行了细微修改,结果如下:
<template>
 <div class="homepage-hero-module">
 <div class="video-container">
 <div :style="fixStyle" class="filter"></div>
 <video :style="fixStyle" autoplay loop class="fillWidth" v-on:canplay="canplay">
 <source src="PATH_TO_MP4" type="video/mp4"/>
 浏览器不支持 video 标签,建议升级浏览器。
 <source src="PATH_TO_WEBM" type="video/webm"/>
 浏览器不支持 video 标签,建议升级浏览器。
 </video>
 <div class="poster hidden" v-if="!vedioCanPlay">
 <img :style="fixStyle" src="PATH_TO_JPEG" alt="">
 </div>
 </div>
 </div>
</template>
模板中, filter 类的 div 标签是一层背景视频的蒙版,可以通过蒙版控制视频的亮暗以及色温等。
video 标签为标准的 HTML5 标签,提供两种格式的视频以及一张图片占位符,背景视频在加载完毕后即自动播放。
Coverr 提供的原始模板,直接调试,页面只显示图片,而无法播放视频,通过使用 Vue.js 的 v-if 指令解决了该问题。
2.2 CSS
对原始模板 CSS 代码进行了大幅精简,修改后的 CSS 代码如下所示:
<style scoped>
 .homepage-hero-module,
 .video-container {
 position: relative;
 height: 100vh;
 overflow: hidden;
 }
 .video-container .poster img,
 .video-container video {
 z-index: 0;
 position: absolute;
 }
 .video-container .filter {
 z-index: 1;
 position: absolute;
 background: rgba(0, 0, 0, 0.4);
 }
</style>
由于大多数样式均被项目全局修改了,所以在此专用于此模板的样式只剩下三条,简要说明如下:
- 容器 div 铺满浏览器窗口
- 蒙版 div 位于视频的上方,以起到蒙版的作用。
2.3 JavaScript 代码
<script>
 export default {
 name: 'login',
 data() {
 return {
 vedioCanPlay: false,
 fixStyle: ''
 }
 },
 methods: {
 canplay() {
 this.vedioCanPlay = true
 }
 },
 mounted: function() {
 window.onresize = () => {
 const windowWidth = document.body.clientWidth
 const windowHeight = document.body.clientHeight
 const windowAspectRatio = windowHeight / windowWidth
 let videoWidth
 let videoHeight
 if (windowAspectRatio < 0.5625) {
  videoWidth = windowWidth
  videoHeight = videoWidth * 0.5625
  this.fixStyle = {
  height: windowWidth * 0.5625 + 'px',
  width: windowWidth + 'px',
  'margin-bottom': (windowHeight - videoHeight) / 2 + 'px',
  'margin-left': 'initial'
  }
 } else {
  videoHeight = windowHeight
  videoWidth = videoHeight / 0.5625
  this.fixStyle = {
  height: windowHeight + 'px',
  width: windowHeight / 0.5625 + 'px',
  'margin-left': (windowWidth - videoWidth) / 2 + 'px',
  'margin-bottom': 'initial'
  }
 }
 }
 window.onresize()
 }
 }
</script>
以上代码中最重要的部分是对 window 对象的 onresize 事件的监听。当窗口大小更改时,程序同步修改 video 及蒙版 dom 的尺寸,使得视频的最窄的边始终撑满浏览器的窗口,而长的边左右两边被均匀地裁减。
这样操作,可以使得视频不会被拉伸,视频中心始终位于浏览器的中心,并且在随意拉伸浏览器窗口时,视频的内容始终得到最大限度的保留,并且可以得到最好的视觉效果。
最终效果如下所示:

参考资料
资源网站「Coverr」
总结